|
US of the snapping iliopsoas tendon. MATERIALS AND METHODS. RESULTS. CONCLUSION. |
Kategoriarkiv: Hip(Adult)
examination-article1
|
The snapping hip: clinical and imaging findings in transient subluxation of the iliopsoas tendon. PATIENTS AND METHODS. RESULTS. CONCLUSIONS. |
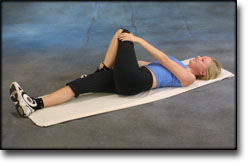
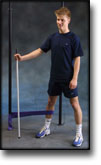
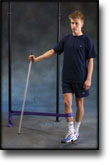
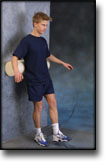
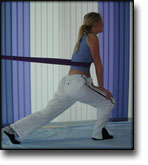
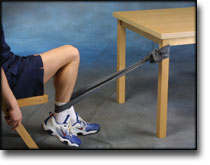
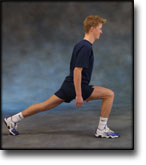
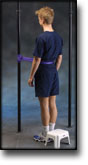
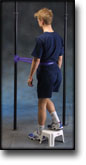
step4
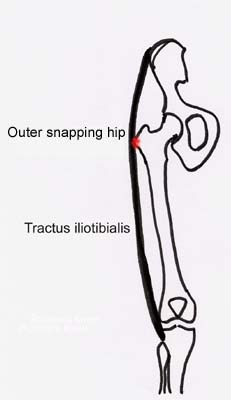
Training ladder for:
OUTER SNAPPING HIP
(COXA SALTANS, EXTERN)
STEP 4 |
Unlimited: Cycling. Swimming. Running.
|
|||||||||||||||||||||||||||||||||||||||||||||||||||


|
Stretching is carried out in the following way: stretch the muscle group for 3-5 seconds. Relax for 3-5 seconds. The muscle group should subsequently be stretched for 20 seconds. The muscle is allowed to be tender, but must not hurt. Relax for 20 seconds, after which the procedure can be repeated. The time consumed for stretching, coordination and strength training can be altered depending on the training opportunities available and individual requirements. |
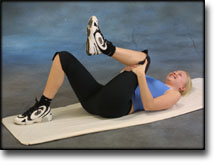
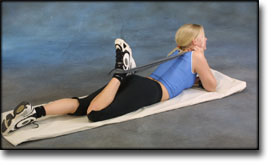
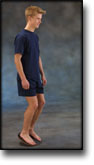
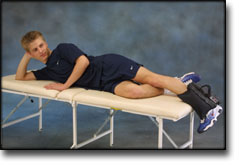
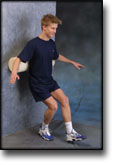
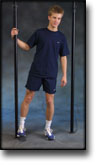
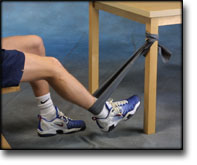
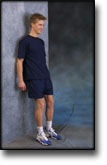
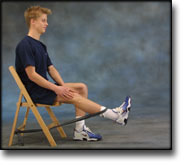
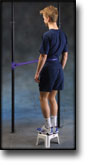
step3
Training ladder for:
OUTER SNAPPING HIP
(COXA SALTANS, EXTERN)
STEP 3 |
Unlimited: Cycling with raised saddle. Swimming. Running with increasing speed and distance.
|
|||||||||||||||||||||||||||||||||||||||||||||||||||||
|
Stretching is carried out in the following way: stretch the muscle group for 3-5 seconds. Relax for 3-5 seconds. The muscle group should subsequently be stretched for 20 seconds. The muscle is allowed to be tender, but must not hurt. Relax for 20 seconds, after which the procedure can be repeated. The time consumed for stretching, coordination and strength training can be altered depending on the training opportunities available and individual requirements. |
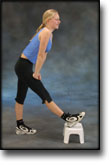
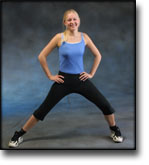
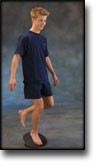
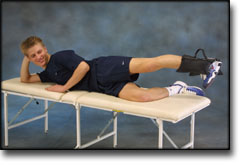
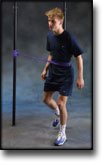
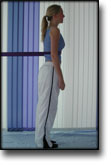
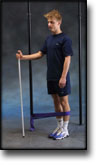
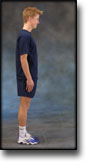
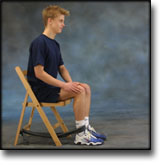
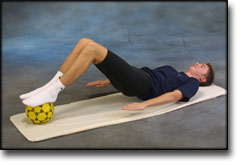
step2
Training ladder for:
OUTER SNAPPING HIP
(COXA SALTANS, EXTERN)
STEP 2 |
Unlimited: Cycling with raised saddle. Swimming. Light jogging.
|
||||||||||||||||||||||||||||||||||||||||||||||||||||||||
|
Stretching is carried out in the following way: stretch the muscle group for 3-5 seconds. Relax for 3-5 seconds. The muscle group should subsequently be stretched for 20 seconds. The muscle is allowed to be tender, but must not hurt. Relax for 20 seconds, after which the procedure can be repeated. The time consumed for stretching, coordination and strength training can be altered depending on the training opportunities available and individual requirements. |
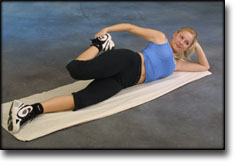
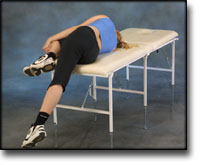
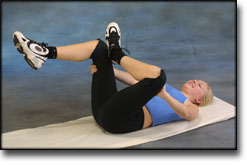
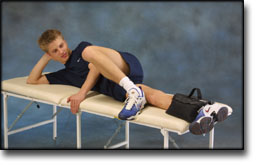
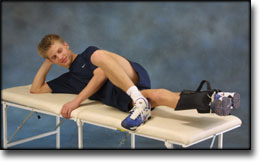
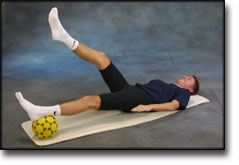
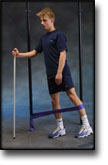
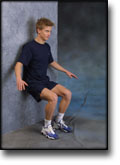
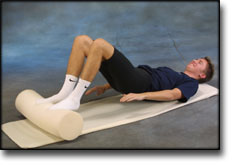
step1
Training ladder for:
OUTER SNAPPING HIP
(COXA SALTANS, EXTERN)
STEP 1 |
| The indications of time after stretching, coordination training and strength training show the division of time for the respective type of training when training for a period of one hour. The time indications are therefore not a definition of the daily training needs, as the daily training is determined on an individual basis.
|
||||||||||||||||||||||||||||||||||||||||||||||||
|
Stretching is carried out in the following way: stretch the muscle group for 3-5 seconds. Relax for 3-5 seconds. The muscle group should subsequently be stretched for 20 seconds. The muscle is allowed to be tender, but must not hurt. Relax for 20 seconds, after which the procedure can be repeated. The time consumed for stretching, coordination and strength training can be altered depending on the training opportunities available and individual requirements. |
examination-article
|
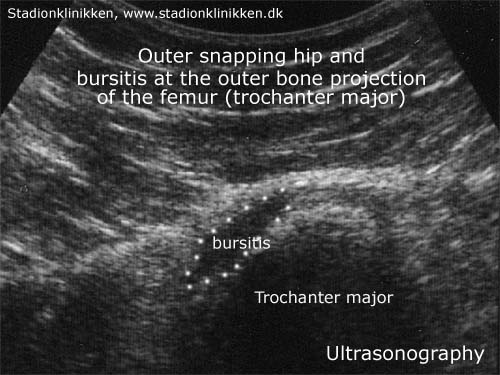
Extraarticular snapping hip: sonographic findings. MATERIALS AND METHODS. RESULTS. CONCLUSION. |
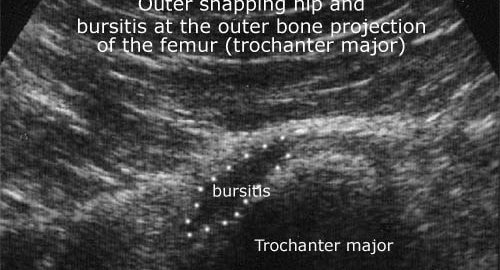
ultrasonic-image
cause-article
|
Coxa Saltans: The Snapping Hip Revisited. |
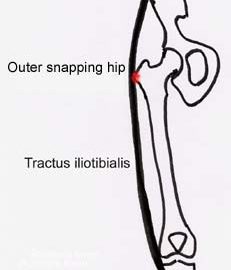
drawing