Kategoriarkiv: Luxation of the knee cap

KONDITION

STEP4

Training ladder for:
LUXATION OF THE KNEE CAP
(LUXATIO PATELLAE)

STEP 4

KONDITION
Unlimited: Cycling. Swimming. Running and spurting with sudden directional change.

UDSPÆNDING
(10 min)

Lie on your back. Draw the injured leg up towards your head so that the muscles in the back of the thigh become increasingly stretched. Perform the exercise with outstretched as well as bent knee. Hold the position for 20 seconds and relax for 20 seconds before repeating. The exercise can also be performed standing with the injured leg outstretched on a chair while the upper body is bent slightly forwards.

Stand with support from the back of a chair or the wall. Using your hand, bend the knee and draw the foot up and your knee slightly backwards so that the muscles in the front of the thigh become increasingly stretched. Hold the position for 20 seconds and relax for 20 seconds before repeating. The exercise can also be done lying down. If you lie on your stomach you can draw the foot up by using a towel.

Lie on your side on a table. Bend one leg up under your body and let the other hang over the edge of the table so that the muscles in the outer side of the thigh become increasingly stretched. Hold the position for 20 seconds and relax for 20 seconds before repeating. The exercise can also be done standing by placing the outstretched injured leg behind the good leg at the same time as bending over the injured leg.

Lie on your back with one leg outstretched and the other bent with the foot on the other side of the outstretched leg. Draw the knee up towards the opposite shoulder so that the buttocks become increasingly stretched. Hold the position for 20 seconds and relax for 20 seconds before repeating.

Lie on your back with one leg over the other, and hold behind the lower leg’s knee. Draw the leg up towards your head so that the buttock on the upper leg becomes increasingly stretched. Hold the position for 20 seconds and relax for 20 seconds before repeating.

Sit with bent knees and the soles of your feet together. Place your hands on your knees and slowly press the knees apart so that the groin becomes increasingly stretched. Hold the position for 20 seconds and relax for 20 seconds before repeating.

Stand with one leg outstretched and the other slightly bent. Thrust your weight to the side over the bent leg so that the inner side of the opposite thigh becomes increasingly stretched. Hold the position for 20 seconds and relax for 20 seconds before repeating.

KOORDINATION
(5 min)

Seesaw. Balance on two legs, possibly using a hand as support against the wall, balancing subsequently on one leg without support. Look straight ahead and keep knees bent.

STYRKE
(45 min)

Sit on a chair with elastic around the ankle, facing the elastic. Lift the leg and slowly bend and stretch the knee.

Sit on a chair with elastic attached to the ankle. Raise the leg and slowly stretch and bend the knee.

Stand with elastic around the hip. Step forward over one knee and hold the front foot firmly against the floor. Bend the rear leg and go forward onto your toes. Remember to change leg.

Lie on your side on a mattress or bench. Flex the lower part of the leg and stretch the upper part. It is important to completely stretch the hip. Lift the upper leg upwards with the heel pointing towards the ceiling. Gradually increase the load by attaching a sandbag to the ankle.

Lie on your side on a mattress or bench. Stretch the lower leg whilst the upper leg is slightly bent. Lift the lower leg stretched upwards. Gradually increase the load by attaching a sandbag to the ankle.

Stand on the healthy leg with the elastic around the inside of the injured leg. Move the injured leg from side to side in a slow smooth movement. Moving the position of the elastic lower down the leg can increase the load.

Stand on the healthy leg with the elastic around the outside of the injured leg. Move the injured leg from side to side in a slow smooth movement. Moving the position of the elastic lower down the leg can increase the load.

Stand with your back against a wall with a ball or firm round cushion between the wall and your back. Slowly go down to bend your knee 90 degrees before slowly rising up again.

Stretching is carried out in the following way: stretch the muscle group for 3-5 seconds. Relax for 3-5 seconds. The muscle group should subsequently be stretched for 20 seconds. The muscle is allowed to be tender, but must not hurt. Relax for 20 seconds, after which the procedure can be repeated. The time consumed for stretching, coordination and strength training can be altered depending on the training opportunities available and individual requirements.

KONDITION

STEP3

Training ladder for:
LUXATION OF THE KNEE CAP
(LUXATIO PATELLAE)

STEP 3

KONDITION
Unlimited: Cycling. Swimming. Running with increasing speed and cautious directional change.

UDSPÆNDING
(10 min)

Lie on your back. Draw the injured leg up towards your head so that the muscles in the back of the thigh become increasingly stretched. Perform the exercise with outstretched as well as bent knee. Hold the position for 20 seconds and relax for 20 seconds before repeating. The exercise can also be performed standing with the injured leg outstretched on a chair while the upper body is bent slightly forwards.

Stand with support from the back of a chair or the wall. Using your hand, bend the knee and draw the foot up and your knee slightly backwards so that the muscles in the front of the thigh become increasingly stretched. Hold the position for 20 seconds and relax for 20 seconds before repeating. The exercise can also be done lying down. If you lie on your stomach you can draw the foot up by using a towel.

Lie on your side on a table. Bend one leg up under your body and let the other hang over the edge of the table so that the muscles in the outer side of the thigh become increasingly stretched. Hold the position for 20 seconds and relax for 20 seconds before repeating. The exercise can also be done standing by placing the outstretched injured leg behind the good leg at the same time as bending over the injured leg.

Stand with one leg outstretched and the other slightly bent. Thrust your weight to the side over the bent leg so that the inner side of the opposite thigh becomes increasingly stretched. Hold the position for 20 seconds and relax for 20 seconds before repeating.

KOORDINATION
(5 min)

Seesaw. Balance on two legs, possibly using a hand as support against the wall, balancing subsequently on one leg without support. Look straight ahead and keep knees bent.

STYRKE
(45 min)

Sit on a chair with elastic around the ankle, facing the elastic. Lift the leg and slowly bend and stretch the knee.

Sit on a chair with elastic attached to the ankle. Raise the leg and slowly stretch and bend the knee.

Go forward on the injured leg until the knee is bent to max. 90 degrees. Stand up on the same leg and return to the starting position.

Lie on your side on a mattress or bench. Flex the lower part of the leg and stretch the upper part. It is important to completely stretch the hip. Lift the upper leg upwards with the heel pointing towards the ceiling. Gradually increase the load by attaching a sandbag to the ankle.

Lie on your side on a mattress or bench. Stretch the lower leg whilst the upper leg is slightly bent. Lift the lower leg stretched upwards. Gradually increase the load by attaching a sandbag to the ankle.

Stand on the healthy leg with the elastic around the inside of the injured leg. Move the injured leg from side to side in a slow smooth movement. Moving the position of the elastic lower down the leg can increase the load.

Stand on the healthy leg with the elastic around the outside of the injured leg. Move the injured leg from side to side in a slow smooth movement. Moving the position of the elastic lower down the leg can increase the load.

Stand on the injured leg up on a stool with the elastic around your waist. Stand facing the wall. Walk backwards up and down from the stool under resistance from the elastic, alternating between right and left leg first.

Stand with your back to the wall with your weight on both feet. Slowly go down and bend the knee to 90 degrees, and slowly rise again.

Stretching is carried out in the following way: stretch the muscle group for 3-5 seconds. Relax for 3-5 seconds. The muscle group should subsequently be stretched for 20 seconds. The muscle is allowed to be tender, but must not hurt. Relax for 20 seconds, after which the procedure can be repeated. The time consumed for stretching, coordination and strength training can be altered depending on the training opportunities available and individual requirements.

KONDITION

STEP2

Training ladder for:
LUXATION OF THE KNEE CAP
(LUXATIO PATELLAE)

STEP 2

KONDITION
Unlimited: Cycling. Swimming. Light jogging.

UDSPÆNDING
(10 min)

Lie on your back. Draw the injured leg up towards your head so that the muscles in the back of the thigh become increasingly stretched. Perform the exercise with outstretched as well as bent knee. Hold the position for 20 seconds and relax for 20 seconds before repeating. The exercise can also be performed standing with the injured leg outstretched on a chair while the upper body is bent slightly forwards.

Stand with support from the back of a chair or the wall. Using your hand, bend the knee and draw the foot up and your knee slightly backwards so that the muscles in the front of the thigh become increasingly stretched. Hold the position for 20 seconds and relax for 20 seconds before repeating. The exercise can also be done lying down. If you lie on your stomach you can draw the foot up by using a towel.

Lie on your side on a table. Bend one leg up under your body and let the other hang over the edge of the table so that the muscles in the outer side of the thigh become increasingly stretched. Hold the position for 20 seconds and relax for 20 seconds before repeating. The exercise can also be done standing by placing the outstretched injured leg behind the good leg at the same time as bending over the injured leg.

Stand with one leg outstretched and the other slightly bent. Thrust your weight to the side over the bent leg so that the inner side of the opposite thigh becomes increasingly stretched. Hold the position for 20 seconds and relax for 20 seconds before repeating.

KOORDINATION
(5 min)

Seesaw. Balance on two legs, possibly using a hand as support against the wall, balancing subsequently on one leg without support. Look straight ahead and keep knees bent.

STYRKE
(45 min)

Sit on a chair with elastic around the ankle, facing the elastic. Lift the leg and slowly bend and stretch the knee.

Sit on a chair with elastic attached to the ankle. Raise the leg and slowly stretch and bend the knee.

Lie on your side on a mattress or bench. Flex the lower part of the leg and stretch the upper part. It is important to completely stretch the hip. Lift the upper leg upwards with the heel pointing towards the ceiling. Gradually increase the load by attaching a sandbag to the ankle.

Lie on your side on a mattress or bench. Stretch the lower leg whilst the upper leg is slightly bent. Lift the lower leg stretched upwards. Gradually increase the load by attaching a sandbag to the ankle.

Stand on the healthy leg with the elastic around the inside of the injured leg. Move the injured leg from side to side in a slow smooth movement. Moving the position of the elastic lower down the leg can increase the load.

Stand on the healthy leg with the elastic around the outside of the injured leg. Move the injured leg from side to side in a slow smooth movement. Moving the position of the elastic lower down the leg can increase the load.

Go forward on the injured leg until the knee is bent to max. 90 degrees. Stand up on the same leg and return to the starting position.

Stretching is carried out in the following way: stretch the muscle group for 3-5 seconds. Relax for 3-5 seconds. The muscle group should subsequently be stretched for 20 seconds. The muscle is allowed to be tender, but must not hurt. Relax for 20 seconds, after which the procedure can be repeated. The time consumed for stretching, coordination and strength training can be altered depending on the training opportunities available and individual requirements.

KONDITION

STEP1

Training ladder for:
LUXATION OF THE KNEE CAP
(LUXATIO PATELLAE)

STEP 1

The indications of time after stretching, coordination training and strength training show the division of time for the respective type of training when training for a period of one hour. The time indications are therefore not a definition of the daily training needs, as the daily training is determined on an individual basis.

KONDITION
Unlimited: Cycling with raised saddle. Swimming (crawl).

UDSPÆNDING
(5 min)

Stand with support from the back of a chair or the wall. Using your hand, bend the knee and draw the foot up and your knee slightly backwards so that the muscles in the front of the thigh become increasingly stretched. Hold the position for 20 seconds and relax for 20 seconds before repeating. The exercise can also be done lying down. If you lie on your stomach you can draw the foot up by using a towel.

Lie on your side on a table. Bend one leg up under your body and let the other hang over the edge of the table so that the muscles in the outer side of the thigh become increasingly stretched. Hold the position for 20 seconds and relax for 20 seconds before repeating. The exercise can also be done standing by placing the outstretched injured leg behind the good leg at the same time as bending over the injured leg.

Stand with one leg outstretched and the other slightly bent. Thrust your weight to the side over the bent leg so that the inner side of the opposite thigh becomes increasingly stretched. Hold the position for 20 seconds and relax for 20 seconds before repeating.

KOORDINATION
(5 min)

Seesaw. Balance on two legs, possibly using a hand as support against the wall, balancing subsequently on one leg without support. Look straight ahead and keep knees bent.

STYRKE
(50 min)

Sit on a chair with elastic around the ankle, facing the elastic. Lift the leg and slowly bend and stretch the knee.

Sit on a chair and lift the knee to a horizontal position. Hold for 1 minute, lower the leg to approx. 45 degrees for 30 seconds. Lower again to the starting position.

Sit on a chair with the injured leg on a stool or similar. Lift the leg above the stool with the foot flexed at a maximum, and hold the position for 10 seconds, followed by 10 seconds rest. The exercise should be repeated for approx. 3 minutes.

Lie on your side on a mattress or bench. Flex the lower part of the leg and stretch the upper part. It is important to completely stretch the hip. Lift the upper leg upwards with the heel pointing towards the ceiling. Gradually increase the load by attaching a sandbag to the ankle.

Lie on your side on a mattress or bench. Stretch the lower leg whilst the upper leg is slightly bent. Lift the lower leg stretched upwards. Gradually increase the load by attaching a sandbag to the ankle.

Stand on the healthy leg with the elastic around the inside of the injured leg. Move the injured leg from side to side in a slow smooth movement. Moving the position of the elastic lower down the leg can increase the load.

Stand on the healthy leg with the elastic around the outside of the injured leg. Move the injured leg from side to side in a slow smooth movement. Moving the position of the elastic lower down the leg can increase the load.

Stand with the elastic around the injured leg, facing away from the elastic. Move the leg forwards and slowly backwards. The elastic can be moved up and down the leg depending upon the strength of the knee – the stronger the knee, the lower the elastic should be.

Stretching is carried out in the following way: stretch the muscle group for 3-5 seconds. Relax for 3-5 seconds. The muscle group should subsequently be stretched for 20 seconds. The muscle is allowed to be tender, but must not hurt. Relax for 20 seconds, after which the procedure can be repeated. The time consumed for stretching, coordination and strength training can be altered depending on the training opportunities available and individual requirements.

tape-description

Tapening


Type: KNEE STABILISING BANDAGE:

Objective: To control the movement of the kneecap so that it glides up and down in a direct line. The tape should immediately provide less pain, and is a good indicator of whether the patient will gain any benefit of a kneecap stabilising bandage.

Application: The knee should be held slightly bent when applying the tape. One anchor is applied above the knee and one below (A & B), and should be open to the rear. A strip is applied (C) over the kneecap’s lower outer half, so that half the tape is over the kneecap. The tape is in line with the edge of the kneecap, and in this way has a sloping course, lifting and pushing the kneecap slightly inwards. The second strip (D) is applied over the kneecap’s upper outer half, so that half the tape is over the kneecap and runs slanting downwards over the first strip. Finish with further strips on top of the anchors A & B.

bandage-article1

SportNetDoc

Effect of a patellar realignment brace on patients with patellar subluxation and dislocation. Evaluation with kinematic magnetic resonance imaging.

Muhle C, Brinkmann G, Skaf A, Heller M, Resnick D. Am J Sports Med 1999 May-Jun;27(3):350-3.

The object of this study was to evaluate the effect of a patellar realignment brace on patients with patellar subluxation or dislocation. Twenty-one patients (24 patellofemoral joints) with clinical evidence of patellar subluxation (N = 16) or dislocation (N = 5) were examined with the joint inside a positioning device to allow active-motion, kinematic magnetic resonance imaging. To analyze the patellar tracking pattern, the same imaging parameters (patellar tilt angle, bisect offset, and lateral patellar displacement) and section locations were used before and after application of a patellar realignment brace. No statistically significant differences were found in any of the three parameters for the patellofemoral relationships before or after wearing the patellar brace. The results indicated no stabilizing effect of the tested brace in patients with patellar subluxation or dislocation during active joint motion.

treatment-article2

SportNetDoc

Operative versus closed treatment of primary dislocation of the patella. Similar 2-year results in 125 randomized patients.

Nikku R, Nietosvaara Y, Kallio PE, Aalto K, Michelsson JE. Acta Orthop Scand 1997 Oct;68(5):419-23.

To assess whether initial surgery is beneficial for patients with primary dislocation of the patella, we carried out a prospective randomized study. Knee stability was examined under anesthesia, and associated injuries were excluded by diagnostic arthroscopy. 55 patients then had closed treatment and 70 patients were operated on with individually adjusted proximal realignment procedures. Surgery gave no benefit based on 2 years of follow-up. The subjective result was better in the non-operative group in respect of mean Houghston VAS knee score (closed 90, operative 87), but similar in terms of the patient’s own overall opinion and mean Lysholm II knee score. Recurrent instability episodes (redislocation or recurrent subluxation) occurred in 20 nonoperated and in 18 operated patients. Of these, 15 and 12, respectively, then suffered redislocations. Function was better after closed treatment. Serious complications occurred after surgery in 4 patients. In conclusion, the recurrence of patellar dislocation may be more frequent than reported, whatever the form of treatment. Routine operative management cannot be recommended for primary dislocation of the patella.

treatment-article1

SportNetDoc

Acute and chronic patella dislocations. Therapeutic strategies in Danish orthopedic departments.

Johannsen HG, Gad D, Heidemann ED. Ugeskr Laeger 2000 Aug 21;162(34):4523-5.

BACKGROUND.
In review of the literature there is no standard treatment of acute- as well as recurrent dislocation of the patella. Most investigations are retrospective or not randomised. Approximately 1500 patients/year with the diagnosis luxatio patellae are seen in Danish hospitals.

METHODS.
Using a questionnaire we wished to find out how these patients were treated in Danish orthopaedic departments.

RESULTS.
We found that there was no consensus on the treatment of patellar dislocation.

CONCLUSION.
We concluded that there is a need for prospective randomised studies involving a large number of patients, with a long follow up time.

examination-article1

SportNetDoc

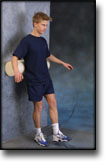
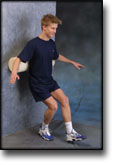
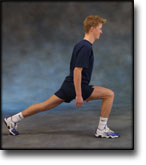
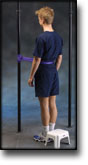
Subluxation of the patella: evaluation of patellar articular cartilage with MR imaging.

Nakanishi K, Inoue M, Harada K, Ikezoe J, Murakami T, Nakamura H, Kozuka T. Br J Radiol 1992 Aug;65(776):662-7.

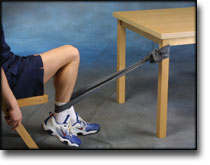
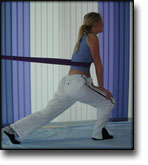
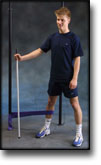
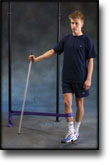
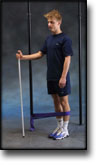
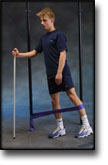
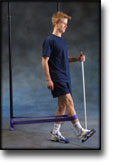
In patients with subluxation of the patella, injury of the patellar articular cartilage is frequently observed, and correct evaluation of this cartilage injury is extremely important for the management of these patients. Magnetic Resonance (MR) studies were performed on 102 patellofemoral (PF) joints of 51 patients with subluxation of the patella and 20 PF joints of 10 healthy volunteers. In 77 of the 102 PF joints with subluxation, arthroscopy and/or operation were performed. MR images were obtained with spin-echo and FLASH sequences, and para-axial images were obtained. We retrospectively analysed the MR findings of the 77 joints with special attention to the surface and thickness of the cartilage, and classified them into four grades. These MR grades were compared with the grades on arthroscopy, and the following results were obtained: MR grade 0, normal cartilage (n = 27, sensitivity 90.9%, specificity 74.2%); MR grade 1, thickening of the cartilage (n = 24, sensitivity 50%, specificity 89.1%); MR grade, surface irregularity of the cartilage (n = 20, sensitivity 85%, specificity 94.7%); MR grade 3, loss of the cartilage (n = 6, sensitivity 100%, specificity 100%). Although the early changes observed by arthroscopy were underestimated from the MR images, MR imaging proved to be extremely useful for evaluating moderately or advanced patellar cartilage injury.