


|
||
|
||
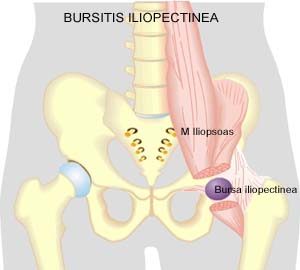
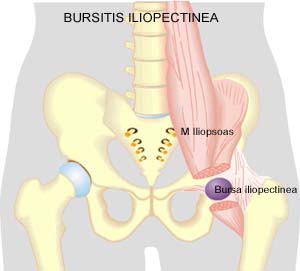
| Cause: Upon repeated loads or blows the bursa can produce increased amounts of fluid, swell and become inflamed and painful.
Symptoms: Pain when applying pressure on the bursa, which occasionally (but far from always) may feel swollen. Pain is agravated upon activation of the deep flexor (flexing the hip joint). Acute treatment: Click here. Examination: In light cases with only minimal tenderness medical examination is not necessarily required. In case of more pronounced pain or lack of progress a medical examination should be carried out to ensure that the diagnosis is correct and commence any treatment. The diagnosis is most easily and quickly made with ultrasound (which allows simultaneous treatment) (article). Treatment: The treatment primarily comprises relief. The treatment can be supplemented with rheumatic medicine (NSAID) or injection of corticosteroid in the bursa preceded by draining of the bursa, which can advantageously be done under ultrasound guidance (article). Complications: If progress is not smooth the correctness of the diagnosis or whether complications have arisen, should be considered:
Special: Shock absorbing shoes or inlays will reduce the load. |
|
||
|
||
|
||
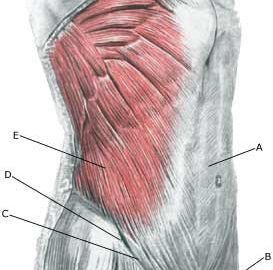
| Cause: If the abdominal wall becomes too weak, the intestines can be pressed through the weak spots in the abdominal wall causing a hernia.
Symptoms: Pain in the groin, aggravated when coughing. Sometimes a swelling in the groin is visible. Usually the swelling (containing intestine) can be pushed into place. If the swelling is painful and cannot be pressed into place the hernia may be strangulated (which requires acute medical assistance). Examination: In obvious cases with visible swelling in the groin the diagnosis is easy to make. With lack of swelling in the groin the diagnosis is naturally difficult. (article 1) A normal medical examination is usually sufficient in order to make the diagnosis, however, if there is any doubt concerning the diagnosis a MRI-scan or a dynamic ultrasound scan, where weaknesses in the abdominal wall can be detected while increasing the pressure in the abdominal cavity by applying pressure can be performed (article 2) (article 3). Treatment: With modest discomfort, you can primarily attempt training of the abdominal muscles (article). If discomfort continues, surgery is advised. If strangulated hernia is suspected you should seek acute medical assistance to evaluate the indication for acute surgery, as there is a risk of lasting damage to the intestine. With uncomplicated surgery, a relief period of approx. two months should be expected before maximal sports activity can be resumed (very dependent on the sport in question). Complications: If progress is not smooth (even after operation) it should be considered whether the diagnosis is correct or whether complication have arisen. In particular the following should be considered:
|
|
||
|
||
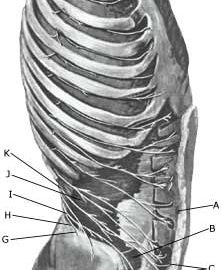
| Cause: If one of the nerve branches is entrapped, pain and sensation disturbances will occur in the area that the nerve supplies sensory nerves to.
Symptoms: Pain in the groin region. Discomfort and sensory disturbances can often be induced if the area where the nerve is entrapped is scratched/pushed. Examination: In the medical examination the doctor attempt to produce the discomfort symptoms by scratching or pushing the area in which the nerve is entrapped. By administering a couple of millilitres of local anaesthetic in this area the symptoms should disappear if the diagnosis is correct (otherwise the diagnosis is wrong). There is no examination (X-ray, ultrasound, MRI, scintigraphy) that can detect the nerve entrapment. The real frequency of the diagnosis is debated amongst professionals. Treatment: Since the condition is harmless and without risk even if you continue sports activity, continuing sport is recommended in the hope that the discomfort will pass on its own. Pausing and alternative training of the abdominal muscles can be attempted. If the discomfort is long-lasting with no sign of abatement, even during summer or winter breaks, you can consider surgically severing the nerve, provided that pain abates when local anaesthesia is administered (article-1) (article-2). Rehabilitation: If the discomfort stems from the nerve, you should be able to resume sports activity immediately following the operation. Complications: Since it can be difficult to make a correct diagnosis in athletes with long-term groin pain (article), it should be supplemented with, amongst other things, ultrasound scanning and consideration of x-ray scintigraphy and possibly an MRI scan. It should be considered whether the diagnosis is correct, and amongst other things consider the following:
|
|
||
|
||
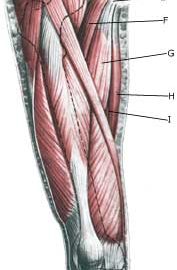
| Cause: When a muscle is subjected to a load beyond the strength of the muscle (jumping, kicking), a rupture occurs. Muscle ruptures in the groin occur most often at the fastening of the adductor longus muscle, which feels like a firm string in the groin. The rupture may be located on the fastening (where there is the greatest risk of the course being long) or in the muscular belly a few centimetres from the fastening (where experience shows that the damage heals faster). The muscle is especially damaged in sports characterised by sprinting with sudden changes of direction and sports with a lot of weight training and modest agility training (football, ice hockey), while it is rarely seen in sports characterised by agility (gymnastics). The vast majority of ruptures are partial ruptures, although total ruptures are described (article).
Symptoms: Pain upon applying pressure along the tendon with worsening upon stretching and activation of the muscle tendon (squeezing stretched legs together against resistance). In light cases a local tenderness is felt after the load (“muscle strain”, “imminent pulled muscle”). In severe cases a sudden shooting pain in the muscle is felt (partial “muscle rupture” or “pulled muscle”) and in the worst case a sudden snap is felt, rendering the muscle unusable (“total muscle rupture”). In case of total rupture a swelling can often be felt on the inside of the thigh. Acute treatment: Click here. Examination: In light cases medical examination in not necessarily required. Severe cases or cases not improved by treatment should be evaluated by a doctor so that a precise diagnosis can be made. A normal medical examination is usually sufficient in order to make the diagnosis, however, if there is any doubt concerning the diagnosis an ultrasound scan can be performed. Ultrasound is well suited to evaluate the tendons. If in the medical examination there is pain when applying pressure on the muscle attachment point in the groin, and aggravation at the same location upon stretching and activation of the adductor, there is hardly any doubt about the diagnosis and an ultrasound scan is not necessary. However, the diagnosis of groin pain can be particularly difficult (article). Treatment: Relief, stretching and slowly increasing load within the pain threshold. Complications: If progress is not smooth it should be considered whether the diagnosis is correct or whether complication have arisen. In particular the following should be considered:
Special: Shock absorbing shoes or inlays will reduce the load in the groin. In case of lack of progress or relapse after successful rehabilitation, a running style analysis can be considered to evaluate whether correction of the running style should be recommended. |
|
||
|
||
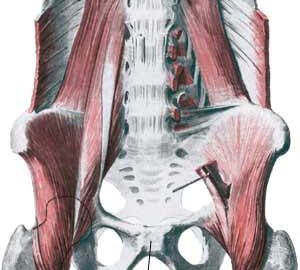
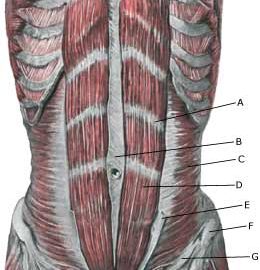
| Cause: occurs in the joint, whereby the joint can become loose so that the two halves of the pelvis can move slightly in relation to one another due to heavy loads. (In many areas the symptoms are the same as those seen in pregnant women with pelvic loosening). The inflammation is a warning that the training is too strenuous, and that if the load is not reduced a chronic condition with a significantly longer rehabilitation period may follow. Inflammation of the pubic joint is often preceded by long-term inflammation of the abdominal muscle fastening on the pubic bone and inflammation of the adductor muscle of the thigh. Inflammation of the pubic joint (osteitis pubis) is especially seen in sports characterised by activity with sprinting with sudden changes of direction (soccer, ice hockey).
Symptoms: Pain around the pubic bone, the abdominal muscle fastening and in the groin. Aggravated with asymmetric loads (jumping on one leg). Acute treatment: Click here. Examination: Inflammation of the pubic bone joint is always an athletically serious condition that always requires medical examination. A normal medical examination is usually sufficient in order to make the diagnosis. Tenderness will often be present on the pubic bone joint (direct and indirect). The examination can be supplemented with X-ray, scintigraphy, MRI- and ultrasound scan. The diagnosis of groin pain can be particularly difficult (article) Treatment: Inflammation of the pubic bone joint is often the end stage of a poorly treated chronic overloading of the muscle fastenings on the pubic bone and the groin. In severe cases the rehabilitation period can be expected to last a year (and in the worst case render a return to sports an impossibility). It is therefore of the utmost importance that the treatment be started as soon as possible, without continuing the condition inducing sports activity. The treatment primarily consists of relief and subsequently slowly increasing training of the musculature around the pubic bone joint (stomach, groin), pelvis and loin. In case of lack of progress with rehabilitation, a medical treatment can be considered in the form of rheumatic medicine (NSAID) or the injection of corticosteroid around the inflamed tendon fastening or in the pubic bone joint (article). The injection can advantageously be ultrasound guided. Since the injection of corticosteroid always is part of a long-term rehabilitation of a very serious, chronic injury, it is decisively necessary, that the rehabilitation course stretches over several months to reduce the risk of relapse. A rehabilitation period of ½ – 1 year before maximum load in the form of maximal running with directional change is allowed is not unusual. Some have tried operating for this condition, which usually returns to normal when the load (sports activity) ceases (article). Particularly careful consideration should be made before accepting a surgical offer with the risks this entails, for a condition that does not threaten mobility nor health (article). Complications: If progress is not smooth the correctness of the diagnosis should be considered. In particular, the following should be considered:
Special: Shock absorbing shoes or inlays will reduce the load in the groin. In case of lack of progress or relapse after successful rehabilitation, a running style analysis can be considered to evaluate whether correction of the running style should be recommended. |
|
||
|
||
|
||
| Cause: Inflammation of the tendon (tendinitis) occurs upon repeated uniform (over)loads. Microscopic ruptures can thus occur in the tendon and in particular at the fastening on the pubic bone, causing an inflammation. Tendinitis is a warning that the exercise load is too strenuous for the muscle tendon in question, and that if the load is not reduced a rupture can occur, with a significantly longer subsequent rehabilitation period. In some cases the inflammation can spread to the pubic joint (osteitis pubis).
Symptoms: Pain around the abdominal muscle fastening on the pubic bone, worsening when applying pressure, stretching and activation of the abdominal muscles (sit-ups, stomach crunches). Acute treatment: Click here. Examination: In light cases, medical examination is not necessarily required. Severe cases or cases not improved by treatment, should be evaluated by a doctor to make a precise diagnosis. A normal medical examination is usually sufficient in order to make the diagnosis. If upon examination there is pain when applying pressure on the muscle fastening in the groin, worsening at the same location upon stretching and activation (sit-ups), there is hardly any doubt concerning the diagnosis even though the diagnosis of groin pain can be particularly difficult (article). However, if there is any doubt concerning the diagnosis an ultrasound scan can be performed. Ultrasound examination is well suited to evaluate the muscles in the area. Treatment: The treatment usually consists of relief and cautious rehabilitation. In case of lack of progress with rehabilitation, medical treatment can be considered in the form of rheumatic medicine (NSAID) or the injection of corticosteroid along the inflamed part of the muscle fastening on the pubic bone. Surgery is rarely necessary (and the results are not convincing). Complications: If satisfactory progress is not achieved, it should be considered whether the diagnosis is correct or whether complications have arisen. In particular the following should be considered:
Special: Shock absorbing shoes or inlays will reduce the load on the muscle fastenings. In case of lack of progress or relapse after successful rehabilitation, a running style analysis can be considered to evaluate whether correction of the running style should be recommended. |

|
||
|
||
| Cause: Inflammation of the tendon (tendinitis) occurs upon repeated uniform (over)loads. Microscopic ruptures can thus occur in the tendon and in particular at the point of attachment, which causes inflammation. Inflammation of the tendon is a warning that the activity is too strenuous on the particular muscle tendon, and that if the load is not reduced a rupture may occur with a significantly longer subsequent rehabilitation period. The adductor longus muscle, which feels like a firm string in the groin, is one of the adductor muscles, that are most frequently damaged. The muscle is especially susceptible to injury in sports characterized by activity with sprinting with sudden directional changes, a lot of weight training and modest agility training (soccer, hockey), while it is very rarely seen in sports where there is typically great agility (gymnastics). In some cases the inflammation can spread to the fastening of the abdominal muscle on the pubic bone and to the pubic bone joint (symphysis).
Symptoms: Pain when applying pressure along the tendon, worsening upon stretching and activation of the muscle tendon (closing of stretched legs against resistance). Acute treatment: Click here. Examination: In light cases medical examination in not necessarily required. Severe cases or cases not improved by treatment should be evaluated by a doctor so that a precise diagnosis can be made. A normal medical examination is usually sufficient in order to make the diagnosis. If in the medical examination there is pain when applying pressure on the muscle attachment point in the groin, and aggravation at the same location upon stretching and activation of the adductor, there is hardly any doubt about the diagnosis. The diagnosis of groin pain can be particularly difficult (article) However, if there is any doubt concerning the diagnosis an ultrasound scan can be performed. Ultrasound is well suited to evaluate the muscles in the area. Treatment: Since tendinitis of the adductor (M adductor longus) in the thigh is one of the sports injuries with the highest risk of becoming chronic, it is imperative that treatment starts as soon as the first symptoms are felt (and not after months of increasing discomfort). The treatment involves relief, stretching and slowly increasing load within the pain threshold (article). Ice treatment should be used after training if tenderness is felt in the groin. If there is a lack of progress with relief and rehabilitation, medical treatment in the form of rheumatic medicine (NSAID) or the injection of corticosteroid around the inflamed part of the tendon may be considered. The injection of corticosteroid is always part of long-term rehabilitation of a very serious chronic injury. It is therefore necessary that the rehabilitation period after the injection treatment stretches over several months to reduce the risk of relapse and ruptures. The tendon can naturally not sustain maximal load after a long-term injury period and only a short-term rehabilitation period. It is not unusual for rehabilitation to stretch over six months, before maximal load in the form of running with directional change is permitted. In cases where there is lack of progress after rehabilitation and conservative treatment, operative treatment can be attempted. The long-term results of operations are often disappointing. Complications: If satisfactory progress is not achieved, it should be considered whether the diagnosis is correct or whether complications have arisen. In particular the following should be considered:
Special: Shock absorbing shoes or indlays will reduce the load in the groin. In case of lack of progress or relapse after successful rehabilitation, a running style analysis can be considered to evaluate whether correction of the running style should be recommended. |
Training ladder for:
DEGENERATIVE ARTHRITIS
(ARTROSE)
STEP 4 |
Unlimited: Cycling. Swimming. Running on a smooth surface.
|
||||||||||||||||||||||||||||||||||||||||||||||||||||||||||||||||||||||
|
Stretching is carried out in the following way: stretch the muscle group for 3-5 seconds. Relax for 3-5 seconds. The muscle group should subsequently be stretched for 20 seconds. The muscle is allowed to be tender, but must not hurt. Relax for 20 seconds, after which the procedure can be repeated. The time consumed for stretching, coordination and strength training can be altered depending on the training opportunities available and individual requirements. |
Training ladder for:
DEGENERATIVE ARTHRITIS
(ARTROSE)
STEP 3 |
Unlimited: Cycling. Swimming. Light running on a smooth surface.
|
||||||||||||||||||||||||||||||||||||||||||||||||||||||||||||||||||||||
|
Stretching is carried out in the following way: stretch the muscle group for 3-5 seconds. Relax for 3-5 seconds. The muscle group should subsequently be stretched for 20 seconds. The muscle is allowed to be tender, but must not hurt. Relax for 20 seconds, after which the procedure can be repeated. The time consumed for stretching, coordination and strength training can be altered depending on the training opportunities available and individual requirements. |
>