Kategoriarkiv: Foot

KONDITION

STEP2

GENOPTRÆNING

TRAINING LADDER FOR CHILDREN AND ADOLESCENTS:
FOR INNER LIGAMENT INJURY IN THE ANKLE JOINT
(RUPTURA TRAUMATICA LIGAMENTI DELTOIDEI PEDIS)

STEP 2

KONDITION
Unlimited: Cycling. Swimming, Light running straight ahead (without directional change) on a smooth surface.

KOORDINATION
(10 min)

Stand on one leg. Play the ball up against the wall.

Stand on one leg on the floor or a mattress. Look straight ahead and keep the knee slightly bent.

Seesaw. Balance on two legs, possibly using a hand as support against the wall, balancing subsequently on one leg without support. Look straight ahead and keep knees bent.

STYRKE
(10 min)

Sit on the floor. Tip the foot up and down with elastic under the forefoot so that the elastic becomes taut.

Sit on the floor. Tip the foot up and down with elastic on top of the forefoot so that the elastic becomes taut.

Sit on the floor. Tip the foot from side to side with elastic on the outer side of the foot, without moving the knee.

Sit on the floor. Tip the foot from side to side with elastic on the inner side of the foot, without moving the knee.

Stretching is carried out in the following way: stretch the muscle group for 3-5 seconds. Relax for 3-5 seconds. The muscle group should subsequently be stretched for 20 seconds. The muscle is allowed to be tender, but must not hurt. Relax for 20 seconds, after which the procedure can be repeated.

The time consumed for stretching, coordination and strength training can be altered depending on the training opportunities available and individual requirements.

KONDITION

STEP3

GENOPTRÆNING

TRAINING LADDER FOR CHILDREN AND ADOLESCENTS:
FOR INNER LIGAMENT INJURY IN THE ANKLE JOINT
(RUPTURA TRAUMATICA LIGAMENTI DELTOIDEI PEDIS)

STEP 3

KONDITION
Unlimited: Cycling. Swimming. Running straight ahead (without directional change).

KOORDINATION
(15 min)

Stand on the leg to be trained. Take-off and land on the same leg.

Seesaw. Balance on two legs, possibly using a hand as support against the wall, balancing subsequently on one leg without support. Look straight ahead and keep knees bent.

Stand on the injured leg with your upper body bent forwards at 90 degrees. Lift the good leg in a straight line behind you. When you feel comfortable with the exercise, it can be made more difficult by closing your eyes.

STYRKE
(10 min)

Sit on the floor. Tip the foot up and down with elastic under the forefoot so that the elastic becomes taut.

Sit on the floor. Tip the foot up and down with elastic on top of the forefoot so that the elastic becomes taut.

Sit on the floor. Tip the foot from side to side with elastic on the outer side of the foot, without moving the knee.

Sit on the floor. Tip the foot from side to side with elastic on the inner side of the foot, without moving the knee.

Stand with both legs on the stool with elastic around the hip. Take-off and land with feet together.

Stretching is carried out in the following way: stretch the muscle group for 3-5 seconds. Relax for 3-5 seconds. The muscle group should subsequently be stretched for 20 seconds. The muscle is allowed to be tender, but must not hurt. Relax for 20 seconds, after which the procedure can be repeated.

The time consumed for stretching, coordination and strength training can be altered depending on the training opportunities available and individual requirements.

KONDITION

STEP4

GENOPTRÆNING

TRAINING LADDER FOR CHILDREN AND ADOLESCENTS:
FOR INNER LIGAMENT INJURY IN THE ANKLE JOINT
(RUPTURA TRAUMATICA LIGAMENTI DELTOIDEI PEDIS)

STEP 4

KONDITION
Unlimited: Cycling. Swimming. Running with directional change.

UDSPÆNDING
(10 min)

Stand with the injured leg stretched backwards with the toes facing front. Slowly bend the knee so that the calf muscles become increasingly stretched. Hold the position for 20 seconds and relax for 20 seconds before repeating.

Stand with the injured leg outstretched with the ankle joint bent up against the wall. Press your abdomen against the wall so that the calf muscles become increasingly stretched. Hold the position for 20 seconds and relax for 20 seconds before repeating.

Stand on the good leg while gaining support on the wall with the hand on the same side. Bend the knee of the injured leg and draw the heel towards the buttocks. Take hold of the big toe side of the foot and draw slowly upwards so that the ankle joint is stretched to the maximum and drawn slightly outwards so that increased stretching is experienced on the inside of the shin bone. Hold the position for 20 seconds and relax for 20 seconds before repeating.

Stand on the good leg while gaining support from the wall with the opposite hand. Bend the knee of the injured leg and draw the heel towards the buttocks. Take hold of the little toe side of the foot and draw slowly upwards so that the ankle joint is stretched to the maximum and drawn over the good leg so that increased stretching is experienced on the outer side of the shin bone. Hold the position for 20 seconds and relax for 20 seconds before repeating.

KOORDINATION
(15 min)

Stand on the leg to be trained. Take-off and land on the same leg.

Seesaw. Balance on two legs, possibly using a hand as support against the wall, balancing subsequently on one leg without support. Look straight ahead and keep knees bent.

Stand on the injured leg with your upper body bent forwards at 90 degrees. Lift the good leg in a straight line behind you. When you feel comfortable with the exercise, it can be made more difficult by closing your eyes.

STYRKE
(10 min)

Sit on the floor. Tip the foot up and down with elastic under the forefoot so that the elastic becomes taut.

Sit on the floor. Tip the foot up and down with elastic on top of the forefoot so that the elastic becomes taut.

Sit on the floor. Tip the foot from side to side with elastic on the outer side of the foot, without moving the knee.

Sit on the floor. Tip the foot from side to side with elastic on the inner side of the foot, without moving the knee.

Stand on the healthy leg with elastic fixed around the hip. The elastic should be fixed to the wall or a wall bar. Take-off on the healthy leg and land on the leg to be trained and keep your balance. Remember that the elastic should be positioned so that it gives resistance at the moment of take-off. Change legs.

Stand with both legs on the stool with elastic around the hip. Take-off and land with feet together.

Stretching is carried out in the following way: stretch the muscle group for 3-5 seconds. Relax for 3-5 seconds. The muscle group should subsequently be stretched for 20 seconds. The muscle is allowed to be tender, but must not hurt. Relax for 20 seconds, after which the procedure can be repeated.

The time consumed for stretching, coordination and strength training can be altered depending on the training opportunities available and individual requirements.

Metatarsus ligament rupture

Diagnosis: METATARSUS LIGAMENT RUPTURE
(Ruptura traumatica ligamenti pedis)


Anatomy:
The foot bones comprise the 7 tarsal bones (ossa tarsi), the 5 metatarsal bones (ossa metatarsi) and the 14 bones in the toes (phalanx). Large or small ligaments (metarsus ligaments) run between all the bones, which stabilise the joints if twisted and running with directional change.

  1. Lig. tibiofibulare anterius
  2. Lig. talofibulare anterius
  3. Lig. talonaviculare
  4. Lig. calcaneocuboideum (Lig. bifurcatum)
  5. Lig. calcaneonaviculare (Lig. bifurcatum)
  6. Ligg. tarsi dorsalia
  7. Lig. cuneocuboideum interosseum
  8. Lig. calcaneocuboideum
  9. Lig. talocalcaneum interosseum
  10. Retinaculum mm. peroneorum inferius
  11. Lig. calcaneofibulare
  12. Lig. talocalcaneum laterale
  13. Lig. talofibulare posterius
  14. Lig. tibiofibulare posterius
  15. Fibula

OUTER ANKLE JOINT


  1. Ligamentum mediale/deltoideum
  2. Pars tibiotalaris posterior
  3. Pars tibiocalcanearis
  4. Retinaculum mm. flexorum (m. flexor hallucis longus)
  5. Lig. talocalcaneum mediale
  6. Lig plantare longum
  7. Lig. calcaneonaviculare plantare
  8. Lig. cuneonaviculare plantare
  9. Os naviculare
  10. Os cuneiforme mediale
  11. Ligg. cuneonavicularia dorsalia
  12. Lig talonaviculare
  13. Pars tibionavicularis
    (lig. deltoidei)
  14. Talus
  15. Pars tibiotalaris anterior
  16. Tibia

INNER ANKLE JOINT

Cause: A violent twist of the joint can in light cases result in a strain or sprain of the ligament, whereas sever cases can result in full or partial rupture or tear.

Symptoms: Pain in the ligament also occuring with load (twist) on the joint which the ligament stabilises.

Acute treatment: Click here.

Examination: Clinical examination is normally not required in light cases (strain/sprain) with only minimal tenderness, and no discomfort when walking. More pronounced pain will demand examination to exclude bone fracture, bone membrane tear (periosteal avulsion), inflammation of the tendon sheath, concentration of fluid in the joint (traumatic arthritis/synovitis). A normal medical (evt. clinical) examination is usually sufficient in order to make the diagnosis. X-ray will confirm or exclude any suspicion of fracture. Small bone membrane tears are best seen under ultrasound scanning.

Treatment: Treatment of uncomplicated metatarsus ligament rupture will normally be conservative (rehabilitation).

Bandage: In the rehabilitation phase, tape can be used when running on uneven surfaces or running with rapid directional change begins. The tape has, however, not the same important purpose as for ligament injuries on the large outer or inner ligaments in the ankle, (tape-instruction).

Complications: If there is not a steady improvement in the condition consideration must be given as to whether the diagnosis is correct, or if complications have arisen:

Muscular bleeding

Diagnosis: BLEEDING IN THE MUSCLE IN THE FOOT
(Haematoma)


Anatomy:
The muscles often comprise a muscle belly and a muscular tendon, which are attached to a bone. The muscle belly is found on the back of the foot, between forefoot bones and under the sole.

  1. M. extensor hallucis longus
  2. M. extensor hallucis brevis
  3. M. abductor hallucis
  4. Mm. interossei dorsales
  5. M. abductor digiti minimi
  6. M. extensor dititorum brevis
  7. Tendo m. peronei tertii
  8. M. extensor digitorum brevis
  9. M. extensor digitorum longus

MUSCLES IN THE BACK OF THE FOOT

  1. M. flexor hallucis brevis
  2. M. flexor digitorum brevis
  3. M. abductor hallucis
  4. M. abductor digiti minimi
  5. M. flexor digiti minimi brevis
  6. Mm. lumbricales

MUSCLES IN THE SOLE OF THE FOOT

Cause: The fleshy part of the muscles contains a great number of blood vessels which will often bring about bleeding if there is a rupture of the muscle fibres due to a tearing or blow.

Symptoms: Pain when pressure is applied, activating and stretching the damaged muscle. There is often a sense of the muscle being firm or filling out.

Examination: A medical examination is not required in slight cases. If satisfactory progress is not achieved a medical examination may be required in order to make the diagnosis. A normal medical examination is usually sufficient in order
to make the diagnosis, however, if there is any doubt concerning the
diagnosis an ultrasound scan can be performed.

Treatment: Bleeding on the muscles is treated with relief and rehabilitation. In instances where the bleeding is particularly excessive it may be necessary to perform draining.

Rehabilitation: Rehabilitation is totally dependent upon which muscle is injured. Running can normally be resumed as soon as the pain subsides. Until this is possible, the guidelines under rehabilitation, general should be followed.

Complications: If satisfactory progress is not achieved, an x-ray examination should be performed to exclude the possibility of:

Similarly, an ultrasound scan should be performed to exclude:

Concentration of fluid in the joint (traumatic arthritis/synovitis)

Diagnosis: CONCENTRATION OF FLUID IN THE JOINT
(Traumatic arthritis / synovitis)


Anatomy:
The joints in the foot comprise the large ankle joint (between the shin and the foot, articulatio talocruralis), as well as many smaller joints between the tarsal bones (ossa tarsi) and the metatarsal bones (ossa metatarsi), and the toe joints.

  1. Phalanx media
  2. Tuberositas ossis metatarsalis V
  3. Os cuboideum
  4. Calcaneus
  5. Talus
  6. Os naviculare
  7. Os cuneiforme laterale
  8. Os cuneiforme intermedium
  9. Os cuneiforme mediale
  10. Os metatarsalei
  11. Os sesamoideum
  12. Phalanx proximalis
  13. Phalanx distalis

THE FOOT FROM ABOVE

Cause: Inflammation of the synovial membrane can occur after a violent twist of a joint, which can cause the membrane to thicken and produce fluids resulting in the joint swelling up. The concentration of fluid in the joint (traumatic arthritis/synovitis) is often seen in connection with ligament injuries in the ankle joint area, Associated injuries in chronic lateral ankle instability, but is often overlooked.

Symptoms: Swelling of the joint. Pain with pressure on the joint lines, as well as with passive and active movement of the joint.

Acute treatment: Click here.

Examination: In pronounced cases the diagnosis is made from a normal medical examination, however, experience has shown that diagnosis is difficult and is often overlooked. Ultrasound scanning enables the diagnosis to be made from minor swelling, and swelling in joints that are otherwise difficult to examine.
(article), (Ultrasonic image-1), (Ultrasonic image-2).

Treatment: Treatment is primarily based on relieving the affected area (and treatment of other possible injuries that have developed at the same time). If swelling of the joint persists despite relieving the area as much as possible, a supplement of medicinal treatment in the form of rheumatic medicine (NSAID) can be administered. Alternatively, draining and evaluating the fluid can be performed, and injection of corticosteroid into the joint. Injection into the joint is best performed if ultrasound guided (article).

Rehabilitation: Rehabilitation is completely dependent upon which joint is injured, and which treatment has been administered. Until the swelling and the pain has subsided, the guidelines under rehabilitation, general should be followed.

Complications: If there is not a steady improvement in the condition consideration must be given as to whether the diagnosis is correct, or if complications have arisen:

Inflammation of the tendon sheath

Diagnosis: INFLAMMATION OF THE TENDON SHEATH
(Tenosynovitis)


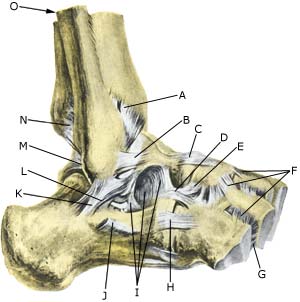
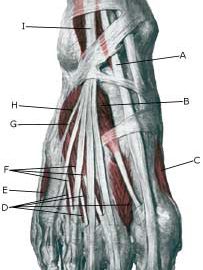
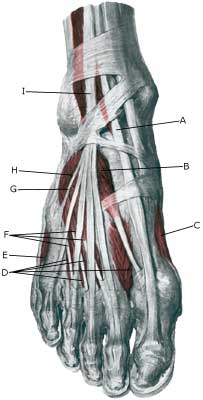
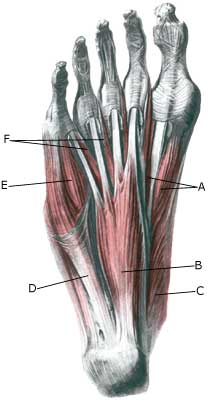
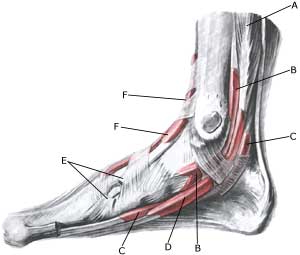
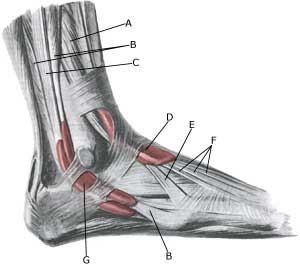
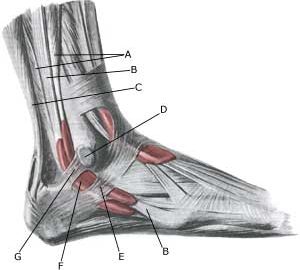
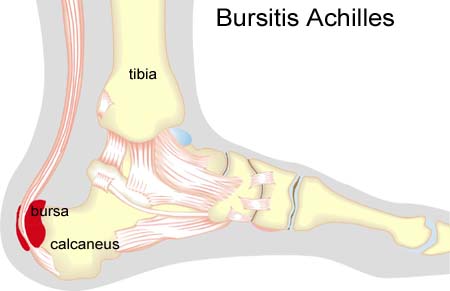
Anatomy:
Tendons from the shin bone to the foot pass both inwardly, outwardly, in front and behind the ankle joint, and continue on the back of the foot and the sole to the toes. The tendons are during part of the course deposited in synovial sheaths.

  1. M. flexor digitorum longus
  2. Vagina synovialis tendinis m. tibialis posterioris
  3. Vagina synovialis tendinis m. flexoris hallucis longi
  4. Vagina tendinum m. flexoris digitorum pedis longi
  5. Tendo m. tibialis anterioris
  6. Vagina tendinis m. tibialis anterioris

INNER FOOT

  1. M. extensor digitorum longus
  2. M. peroneus brevis
  3. M. peroneus longus
  4. Vagina tendinum m. extensoris digitorum pedis longi
  5. M. peroneus tertius
  6. Tendines m. extensoris digitorum longi
  7. Vagina synovilis mm. peroneorum communis

OUTER FOOT

Cause: Inflammation of the tendon sheath (tenosynovitis) occurs either due to a mechanical irritation (e.g. a shoe tied too tightly, or from a kick), or often from a straining of the ligaments in the ankle joint. In some cases, a prolonged inflammation of the tendon sheath can cause a weakening, and in worst cases a rupture of the tendon. Inflammation of the tendon sheath is often seen as a result of ligament injuries (article), but is often unfortunately overlooked, (article). The tendon sheaths surrounding the ankle often communicate with the ankle joint itself, and accumulation of fluid in the tendon sheaths can therefore be a consequence of increased fluid in the ankle joint itself, concentration of fluid in the joint (traumatic arthritis / synovitis).

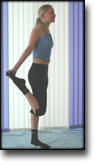
Symptoms: Inflammation of the tendon sheath causes pain along the tendon sheath itself, which is aggravated by stretching and activation of the muscle tendon.

Examination: In obvious cases the diagnosis can be established from a normal medical examination. The diagnosis is, however, easily determinable by use of ultrasound scanning, which can also be advantageously used in cases where steady improvement is not noticeable from relieving the affected area (Ultrasonic image).

Treatment: Treatment is primarily based on relieving the affected area and removal of the provoking factor, if such a factor is in evidence (i.e. tightly bound shoes). If satisfactory progress is not made, the treatment can be supplemented by medicinal treatment in the form of rheumatic medicine (NSAID) Alternatively, draining and evaluating fluid form the tendon sheath can be performed, and injection of corticosteroid into the tendon sheath. Injection into the tendon sheath is best performed if ultrasound guided.

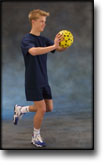
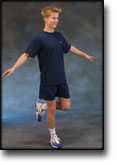
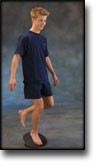
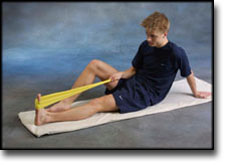
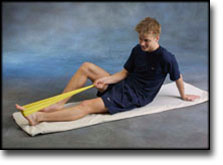
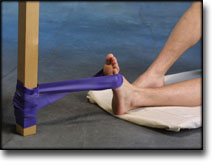
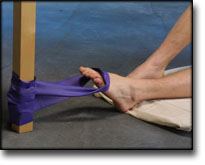
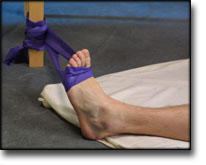
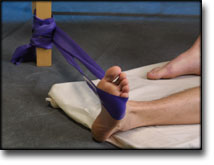
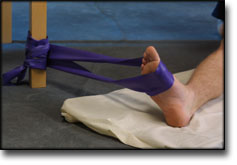
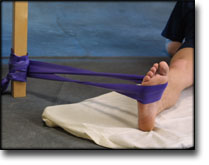
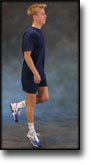
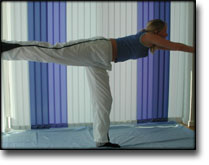
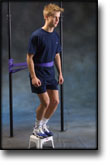
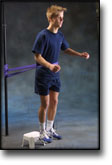
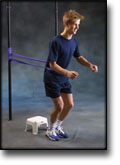
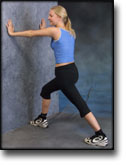
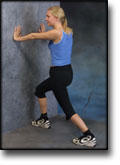
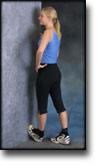
Rehabilitation: Rehabilitation is completely dependent upon which tendon is involved, and whether the inflammation of the tendon sheath is a part of another injury (ligament rupture). The guidelines above (rehabilitation, general) should be followed. Strenuous exercises can be gradually resumed when the pain has decreased.

Complications: If there is not a steady improvement in the condition consideration must be given as to whether the diagnosis is correct, or if complications have arisen:

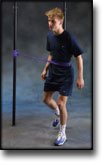
Special: Shock absorbing shoes or inner inlays will reduce the risk of various forms of inflammation of the tendon sheath. In the event of unsatisfactory progress, or relapse after successful rehabilitation, consideration must be given to performing an analysis of the patient’s running style to establish whether a correction of the running style should be recommended.

Tendon luxation of the outer ankle knuckle (peroneus luxation)

Diagnosis: TENDON LUXATION – OUTER ANKLE KNUCKLE
(Peroneus luxation)


Anatomy:
The tendons surrounding the ankle joint are connected to the bones in several places by connective tissue strings (retinaculum). Two peroneus muscles are positioned behind the outer ankle knuckle, which are used to stabilise and flex the ankle joint.


  1. M. peroneus brevis
  2. M. peroneus longus
  3. Tendo calcaneus (Achillis)
  4. Bursa subcutanea malleoli lateralis
  5. Retinaculum mm. peroneorum inferius
  6. Vagina synovialis mm. peroneorum communis
  7. Retinaculum mm. peroneorum superius

OUTER FOOT

Cause: Discomfort can be produced if a rupture of the connective tissue (retinaculum musculorum peroneorum superius & inferius) behind the outer ankle knuckle (malleolus lateralis) occurs. A rupture of the connective tissue (retinaculum) is relatively often combined with outer ligament injuries in the ankle joint.

Symptoms: Pain at the outer ankle knuckle (malleolus lateralis), where certain movements of the ankle joint can give rise to a painful sense of “slipping”.

Acute treatment: Click here.

Examination: When the painful movement of the ankle joint is performed, normal examination can detect the tendon slip over the outer ankle knuckle. A normal medical examination is usually sufficient in order
to make the diagnosis, however, if there is any doubt concerning the
diagnosis it can be made with certainty by use of ultrasound scanning while the ankle joint is in motion (dynamic ultrasound scanning). Ultrasound scanning will reveal whether there is bleeding in the acute stage. Inflammation of the tendon sheath can develop at a later stage.

Treatment: Treatment is primarily concentrated on providing rest from the painful activities (running). If steady progress from rest and rehabilitation is not achieved, and ultrasound scanning reveals inflammation of the tendon sheath, the treatment can be supplemented by medicinal treatment in the form of rheumatic medicine (NSAID) Alternatively, draining and evaluating fluid can be performed, and injection of corticosteroid into the tendon sheath. Injection into the tendon sheath is best performed if ultrasound guided. Surgical intervention can be attempted in certain cases, if resting, rehabilitation and medicinal treatment do not provide the desired result (article).

Complications: If there is not a steady improvement in the condition consideration must be given as to whether the diagnosis is correct, or if complications have arisen:

Possibly supplement with further examinations (x-ray, ultrasound scanning).

Bone membrane tear (periosteal avulsion)

Diagnosis: BONE MEMBRANE TEAR
(Perisotael avulsion)


Anatomy:
The foot bones comprise the 7 tarsal bones (ossa tarsi), the 5 metatarsal bones (ossa metatarsi) and the 14 bones in the toes (phalanx). Muscles or ligaments are attached or anchored to all the bones. The outer surface of the bone is called bone membrane (periosteum), (Ultrasonic image).

Cause: A violent twist can stretch the ligaments and tear a small piece of bone membrane (periosteum) from the ligament anchor point. In other cases, bone membrane tears can occur when the bones impact upon each other (for example if the foot is bent or flexed backwards with great force so that one of the tarsal bones (talus) impacts against the front edge of the shin bone). Bone membrane tears in the ankle joint area are common, and can be seen in most cases where the person has played football for many years (“football-ankle”). Bone membrane tears can occur on all the bones of the foot where tendons or ligaments are anchored.

Symptoms: Pain when applying pressure, and when stretching the tendon or ligament which is attached to the bone.

Acute treatment: Click here.

Examination: Normal clinical examination is often sufficient. Larger tears can be seen on an x-ray. Many lesser tears can be best seen via an ultrasound (Ultrasonic image) scan or MRI examination, (article).

Treatment: Relief from the pain inducing activities. Larger tears can require surgical operation. Lesser tears do not require treatment. Some cases can cause prolonged discomfort with pain which does not recede despite relief. This can be due to the tear causing inflammation in the tissue. In such cases, rheumatic medicine (NSAID) or injection of corticosteroid in the area surrounding the tear can be recommended.

Rehabilitation: Rehabilitation is totally dependent upon the type of tear, and the treatment (conservative or surgical).
Also read rehabilitation, general.

Complications: If there is not a steady improvement in the condition consideration must be given as to whether the diagnosis is correct, or if complications have arisen:

Inflammation of the bursa

Diagnosis: INFLAMMATION OF THE BURSA AT THE ATTACHMENT OF THE ACHILLES TO THE HEEL BONE
(BURSITIS ACHILLES)


Anatomy:
The calf muscle (M Gastrocnemicus) is comprised of two muscle heads which gather in a wide tendinous ligament and continue in to the Achilles tendon. Another of the larger calf muscles (M Soleus) is attached to the front side of the Achilles tendon and thus forms a part of the Achilles tendon. The Achilles is attached to the heel bone (calcaneus). At the heel bone there is a bursa in front of the Achilles anchor point (bursae tendinis Achilles), as well as behind (bursae subcutanea calcanei). The bursa reduce the pressure against the heel bone.

Cause: Inflammation of the bursa in front of and behind the Achilles occurs with continued overload, where the bursa is squeezed against the heel bone (for example an ill-fitting heel cap on the shoe).

Symptoms: Pain when activating the Achilles tendon (running and jumping) and when applying pressure at the point of attachment of the tendon on the heel bone. Contrary to the tenderness occurring with inflammation of the Achilles tendon, the tenderness is localised to the point of attachment to the heel bone.

Acute treatment: Click here.

Examination: Medical examination is not necessarily required in light cases where the tenderness is minimal. In all cases where smooth improvement is not experienced, medical attention should be sought as soon as possible to exclude a (partial) rupture of the Achilles tendon or rupture of the soleus muscle. This situation is best determined by use of ultrasound scanning, as a number of injuries requiring treatment can easily be overlooked during a clinical examination (Ultrasonic image). Ultrasound scanning enables an evaluation of the extent of the change in the tendon; inflammation of the tendon (tendinitis), development of cicatricial tissue (tendinosis), calcification, inflammation of the tissue surrounding the tendon (peritendinitis), inflammation of the bursa (bursitis), as well as (partial) rupture (article).

Treatment: Treatment is primarily comprised of relief from the painful activity (running). It is important that shoes do not pinch the heel. If satisfactory progress is not made during the rehabilitation, medical treatment can be considered in the form of rheumatic medicine (NSAID) or injection of corticosteroid in the bursa. Injections should be performed under ultrasound guidance to ensure optimal effect and reduce the risk of injecting into the Achilles itself. If progress is not made neither through rehabilitation nor medicinal treatment, surgical treatment can be attempted (article-1), (article-2).

Bandage: In some cases a ring of felt (for example) can be taped around the tender bursa which will reduce the pressure from shoes. It is naturally important that the hole in the ring is positioned directly above the bursa.

Complications: If there is not a steady improvement in the condition an ultrasound scan should be performed to exclude: